
Free Valentine’s Day Cut Files and a cute DIY!

The next holiday is coming soon so that means free Valentine’s Day Cut Files and a cute DIY to start off the month. Keep reading as there are lots of free Valentine’s Day SVGs in this post with a cute craft project you can use as decor or a gift!
Disclosure: Some links on this page are affiliate links – meaning if you click through and make a purchase I may receive a commission at no additional cost to you. For more information, read our full affiliate disclosure here.
This is a great craft project for beginning Cricut users. It’s simple and quick so your patience won’t be tested as you start this crafting journey. (This is also a good project for your Cricut Joy!)
I am using one of our free files in our collection of free Valentine’s Day SVG files and a plastic jar you can find at Dollar Trees.
So let’s jump in supplies to make this cute little jar. Perfect for giving as a gift to a teacher, coworker, friend, or heck, just make one for you!

Cute DIY Gift Idea for Valentine’s Day Supply list:
In this supply list, I list the items I used and where I got them from (if I can remember).
I encourage you to get creative and change it up but I wanted to share pretty close to exactly where I got them to help you find the items that stand out to you.

- Small Plastic Jar from Dollar Tree
- M&Ms to fill the jar
- Heat Resistant Ribbon from Hobby Lobby (any cloth type so you can use heat to press on it.)
- Vinyl (HTV from Heat Transfer Warehouse Vinyl)
- Bakers Twine or ribbon
- Glue Gun and Hot Glue


How to Make a Valentine’s Day Cute Candy Jar with Your Cricut
This Valentine’s Day DIY is simple! The hardest part is to iron on the ribbon. But if you haven’t tried it before, I understand it can be a little intimidating. But what’s the worst thing to come from this? you might ruin the ribbon…. That was not a big deal to me as I have a supply of ribbon, and I’m sure something will work. We learn by doing, so jump in and get creative!

Step ONE:
Begin by measuring the ribbon to wrap around the jar and overlap a little. I cut the bottom layer as a point and the ribbon that lays on the top is straight. This makes sure the seam looks more professional as the underlayer won’t peek out on the top and bottom. They just line up better I think.
If your ribbon is thick, keep the point small to avoid a ridge.
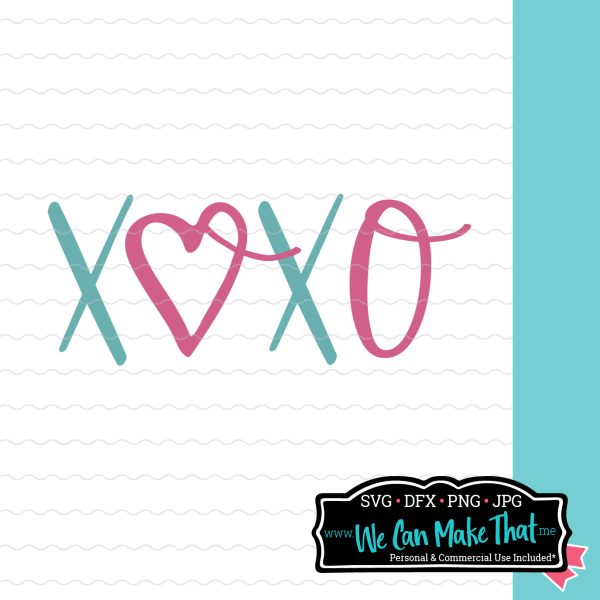
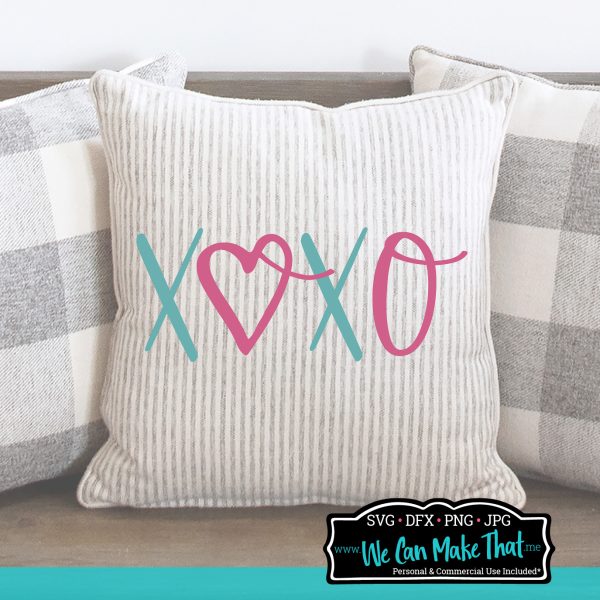
Next, grab one of my free valentine’s day cut files and cut it to fit on your ribbon. I used our free download XOXO in Cricut design space.

Pay attention to the height first, then the width. Does it wrap too far around the jar so it looks goofy? I would make it smaller and add some embellishments (rhinestones, gems, brads, or a tiny bow) to make the SVG appear to ‘fit’ the space.

Step TWO:
Now, grab your favorite Valentine’s Day SVG and cut the SVG out of HTV (Heat Transfer Warehouse Vinyl). Be sure to mirror your SVG if it has words.
(Use a heat pressing pillow if needed). I find these heat press pillows are very helpful when pressing HTV. They make the vinyl stay on better too.

TIP: If the ribbon you selected isn’t heat resistant, then be sure to use adhesive vinyl instead.
Mine is a material-type ribbon and ok with heat. I chose the free XOXO SVG from the shop and cut it out of HTV from Impressed Vinyl. Remember when you use HTV vinyl be sure to mirror the image before cutting.
Valentine’s Day Cutting machine Files:
I cut my free SVG download in two colors. Adding the bottom layer first and only heating for half the time. Then I added the layer I wanted on the top and heated it for the full amount.
FINAL STEP
Add the ribbon to the jar once the SVG designs are on your ribbon the way you want it. Pretty simple! And we are almost done.

Be sure to sample the M&Ms before filling your jar. Quality control is very important ! haha.
I used baker’s twine to wrap around the lid 3X and tied a simple bow. This makes the jar easy to open but looks cute too. Plus, I have a ton of it so good to use it up.

Watch my Layered Heart Card Tutorial
FREE VIDEO TUTORIAL
See how easy it is to make this heart themed card on your Cricut. It’s a great way to use up scraps too!
I think this Quick DIY with the Free Valentine’s Day Cut File turned out cute!

What do you think? Tell me in the comments if you tried using HTV or adhesive vinyl in the comments. We love sharing new ways to use designs from our free svg library
Ways to use these Valentine’s Day SVGs:
- valentine’s day signs
- home decor
- adorable shirt
- decorate tote bags
- Valentine’s Day Cards
More Free SVG Cut Files in Our Shop
The Cut File Formats From Our Shop:
Each cut file in our shop has a variety of formats to work with Cricut Design Space, the silhouette designer edition, Cameo and other personal cutters.
-

-
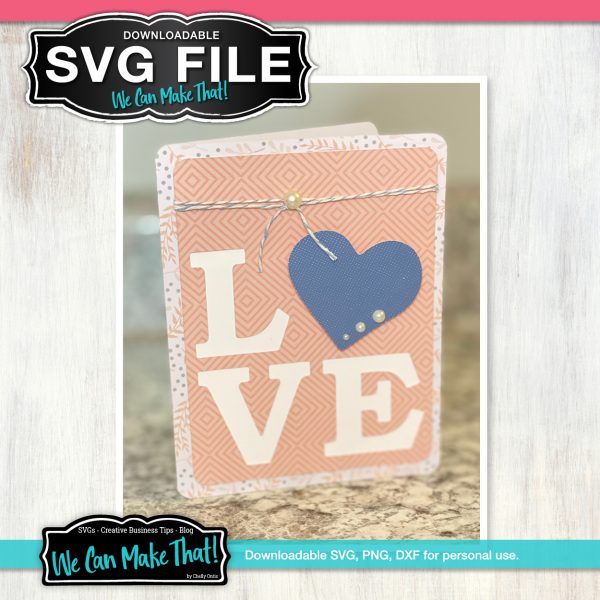
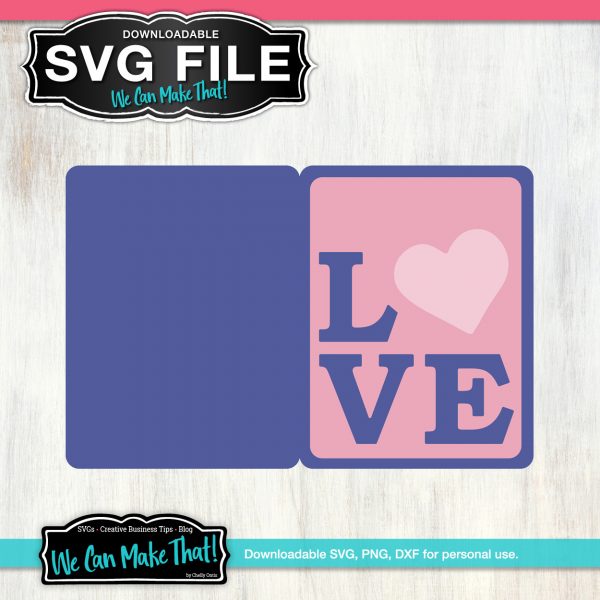
 LOVE Card SVG$3.00
 -


Try to grab the SVG cut file or the DXF cut file for the best image. These will give you the best cut in what ever you are cutting from paper to wood.
Our file formats will include:
- SVG Files
- DXF files
- JPG
- PNG
Read more on SVG files and tips to make sure to use the best one for your cutting machine here.
Free Valentine’s Day SVGs
Sometimes the hardest part of crafting is finding “what to craft” as most of them have enough supplies but just need a nudge to get creating.
The files on our site are for personal use and also come with a commercial license to use when crafting for business. See the difference here on our Commercial Use SVG blog post.
Connect with Chelly!


I love the Valentine’s Day M&M Jar idea! It actually looks like something I can do with the kids. Thank you!
These are really cute, perfect to make for the grandbabies!