Mastering Puff Vinyl: Tips for the Best 3D Effect on Your Cricut Projects
If you’ve ever wanted to add a little puff to your projects (literally), it’s time to jump on the puff vinyl trend! This new 3D material is perfect for giving your DIY projects a unique texture and 3D look, but if you don’t use it correctly, you might end up with a flat disappointment. Whether you’re using a Cricut machine, Cricut AutoPress, or an Easy Press, I’ve got you covered with all the tips to get the perfect press every time.
Disclosure: Some links on this page are affiliate links – meaning if you click through and make a purchase I may receive a commission at no additional cost to you. For more information, read our full affiliate disclosure here.
Let’s begin with some basics so I can show you the best way to use the product and avoid the same mistakes I made when trying puff vinyl. Knowing some of these tips will help you waste less and craft more stress-free.

What is Puff Vinyl?
Puff vinyl (also called 3D puff heat transfer vinyl) is a special type of heat transfer vinyl that expands when heated, creating a raised, puffy vinyl effect. It’s a game-changer for puff vinyl designs like t-shirts, tote bags, and more. Unlike regular heat transfer vinyl, this material requires special care when cutting, pressing, and washing to maintain the 3D effect. If you’re using it for the first time, don’t worry—I’ll walk you through everything you need to know!

Why Try Puff Vinyl?
Puff vinyl is trending for a reason! It gives designs a bold, 3D effect that stands out from regular HTV. Here’s why you should give it a shot:
- It adds a unique texture to shirts, hoodies, hats, and tote bags.
- It works great for simple designs with bold text or shapes.
- You can find different colors to match any project.
- It’s an easy way to create high-end, boutique-style apparel at home.
- It’s a fun material to experiment with, especially for DIY projects!
- It’s more durable than traditional HTV when properly applied and cared for.
- The raised texture gives a professional look that stands out in small business products.

Finding the Right Designs for Puff Vinyl
Choosing the right design is just as important as using the right settings. If you’re looking for SVGs that work well with puff heat transfer vinyl, my SVG Club has tons of designs that are perfect for Cricut crafts. Since simple designs work best for puff vinyl, you’ll find plenty of easy-to-cut, high-impact designs that will puff up beautifully on t-shirts, bags, and more. As a member, you’ll get access to a variety of exclusive SVGs that make crafting easier and more fun!
SVG’s for Puff Vinyl


WAIT LIST OPEN
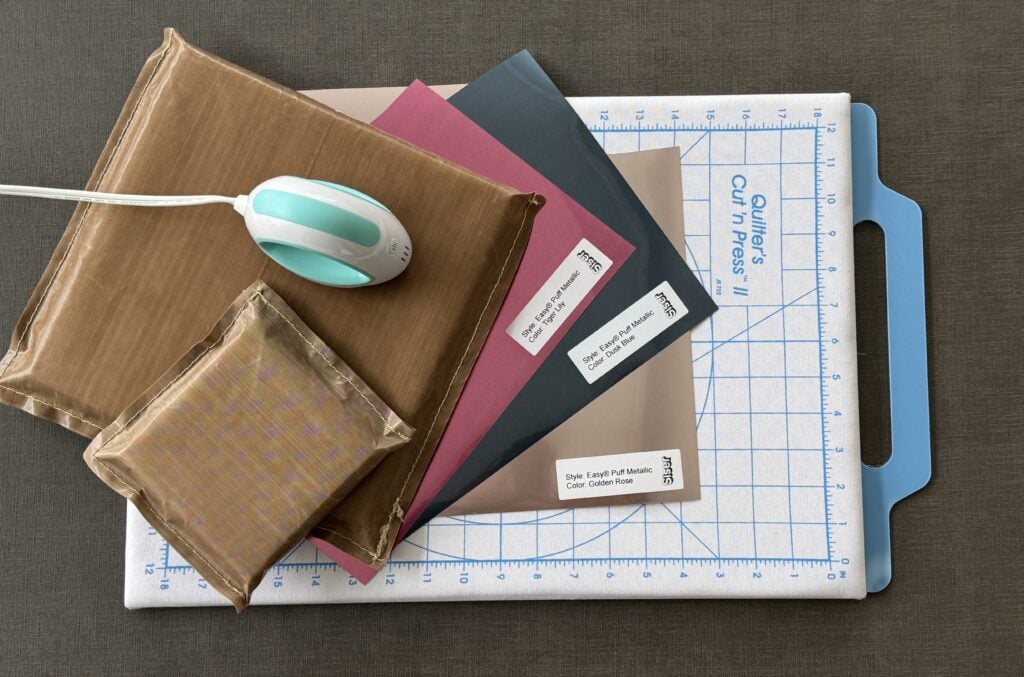
Materials You’ll Need:
- Cutting machine (like a Cricut machine)
- Cutting mat
- Weeding tool
- Puff heat transfer vinyl in different colors
- Cotton t-shirt (or another fabric)
- Cricut EasyPress, Cricut AutoPress, or heat press
- Parchment paper or a Teflon sheet
- A work surface that can handle high heat

Get The Best PUFF Every Time You Press!
- PDF worksheets for Crafters using PUFF vinyl.
- 2 Pages of tips to learn about puff vinyl.
- Steps to help guide you!
Step 1: Cutting Puff Vinyl the Right Way
- Place the vinyl shiny side down on your cutting mat.
- Use the correct cut settings in Cricut Design Space—a test cut is your best option!
- Simple designs work best for puff vinyl—avoid intricate details that may disappear when the puff effect kicks in.
- Remove excess vinyl with a weeding tool to reveal your whole design.
- Use a sharp blade to ensure clean cuts, as dull blades may tear the vinyl.
Puff Vinyl Cutting Machine Settings
I love using Siser Easy Puff for my projects. I always find their quality is best. You can find a list of cutting settings for ALL cutting machines here: https://www.siserna.com/files/cutter-settings.pdf

Step 2: Pressing for the Best Results
This can be a touchy step. I find so many things can make or break this step (see the troubleshooting section on this post if you are having trouble). Siser has a great PDF for their products too. You can download and save a printout of these: https://www.siserna.com/files/heat-transfer-vinyl-instructions.pdf
- Set your heat press to a lower temperature than regular HTV to avoid over-puffing.
- Use medium pressure and press for 10-15 seconds.
- Always check your time settings—too much press time or a lot of pressure can ruin the puff effect.
- Use parchment paper over the clear carrier sheet to prevent overheating.
- If using a large piece, press in sections to ensure even pressure across the design.
- For multi-layer designs, press each layer separately to prevent over-expansion.
- Press from the inside of the garment for a smoother finish and even puff effect.


Step 3: Peeling Like a Pro
- Most puff heat transfer vinyl requires a hot peel—remove the clear carrier sheet immediately after pressing.
- If your design looks flat, try pressing a small piece again to find the right temperature and pressure.
- Some materials may need test presses before applying to different materials.
- If the puff effect isn’t as strong as expected, try adjusting the press time or adding slightly more pressure.

Step 4: Preventing Wrinkles in Puff Vinyl
- Check heat settings: Always consult the manufacturer’s instructions for your heat press’s correct temperature and pressure settings.
- Pre-press the garment: Before applying puff vinyl designs, press your fabric first to remove any wrinkles and moisture.
- Apply even pressure: Ensure the heat press evenly presses the entire design.
- Peel carefully: Wait for the vinyl to cool completely before peeling the clear carrier sheet to prevent warping.

Step 5: Advanced Techniques for Puff Vinyl
- Try combining puff vinyl with regular heat transfer vinyl for unique layered effects.
- Experiment with different colors to add depth and dimension to your designs.
- Use puff vinyl on hats, backpacks, and shoes—just be sure to use the correct press settings for non-flat surfaces.
- Add small puff accents to lettering or shapes for an eye-catching effect (and are easier when the puff vinyl can be so PICKEY).
- Try a gradient press technique by varying heat and pressure slightly for a textured effect.
- If applying to synthetic fabrics, lower your press temperature to prevent scorching.


Step 6: Caring for Your Puff Vinyl Projects
- Wash in cold water to preserve the 3D puff HTV effect.
- Avoid high heat in the dryer—air drying is the best option.
- Never iron directly over heat-transfer vinyl to prevent flattening.
- If your design starts to crack or peel, try repressing with parchment paper and medium pressure.
- Store unused puff heat transfer vinyl in a cool, dry place to prevent warping before use.

Final Thoughts: Is Puff Vinyl Worth It?
Absolutely! Once you get the hang of pressing puff vinyl the right way, you’ll love the bold, 3D effect it gives to your DIY projects. Whether you’re making a camping-themed shirt or just experimenting with different colors, it’s a fun way to elevate your designs. If you love experimenting with different materials, this is one of the most exciting trends in heat transfer vinyl right now!
Free Troubleshooting PDF
Want a cheat sheet with all these tips in one place? Grab my free Puff Vinyl Tips Handout and get the best results every time!
Troubleshooting Wrinkles in Puff Vinyl
Wrinkles in puff heat transfer vinyl can ruin the final look of your design. If you’re seeing uneven textures, ripples, or wrinkles, here are several ways to prevent and fix them:
- Check heat settings: Ensure you’re using the correct temperature and pressure settings based on the manufacturer’s recommendations. Too much heat can cause bubbling, while too little heat can lead to uneven puffing.
- Pre-press the garment: Always press your fabric for 3-5 seconds before applying puff vinyl designs. This step removes moisture and existing wrinkles from the fabric, creating a smoother surface.
- Apply even pressure: If wrinkles appear after pressing, check that your heat press is distributing even pressure across the design. Uneven pressure can cause parts of the vinyl to shrink or over-expand.
- Peel carefully: Wait for the vinyl to cool slightly before peeling the clear carrier sheet to avoid shifting or warping.
- Re-press if needed: If wrinkles appear after peeling, try covering the design with parchment paper and pressing again for 3-5 seconds using medium pressure.
- Avoid excessive pressure: While some pressure is necessary, applying too much force can distort the vinyl and make wrinkles worse. Test on a small piece before pressing your full design.
- Use a heat press over an iron: While an iron can work in a pinch, it often applies uneven heat and pressure, leading to more wrinkles. A heat press or Cricut EasyPress will give the most consistent results.
- Store vinyl properly: Puff vinyl should be stored flat in a cool, dry place. Exposure to humidity or extreme heat before use can cause wrinkling even before you apply it.
By following these tips, you’ll avoid common wrinkles and ensure your puff vinyl projects turn out smooth and professional-looking every time!
Simple Cutting machine Files:
-
 Cat Mom Cut File$3.00
 -
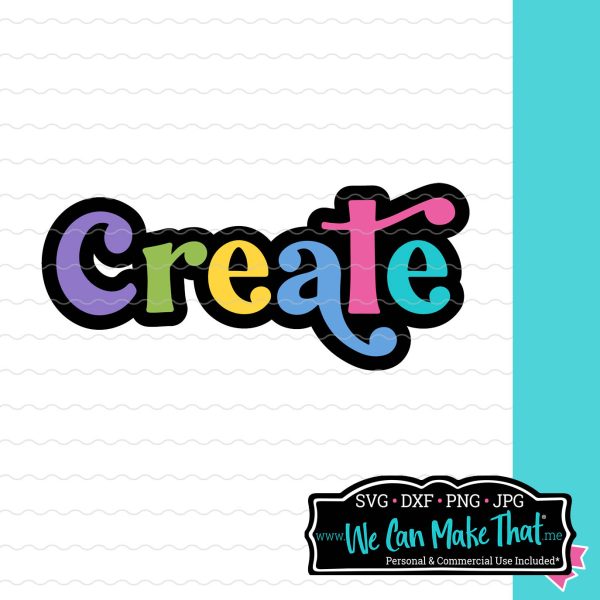
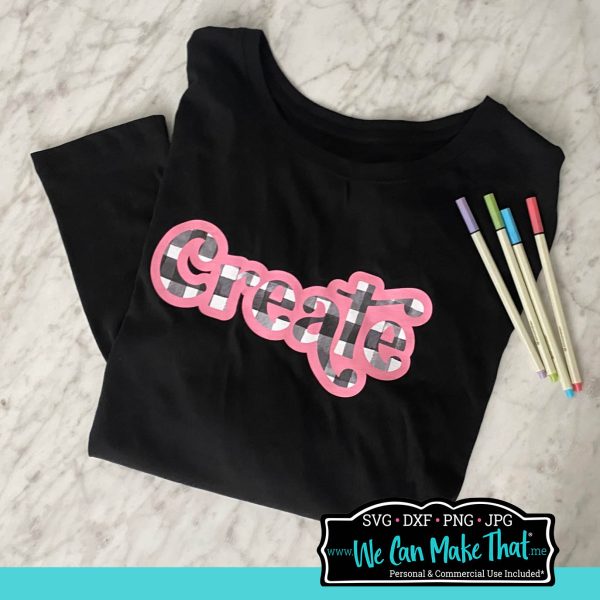
Create Cut File$3.00
-
Blessed SVG Cut File$3.00


Connect with Chelly!