
Refurbished Printer Drawer
How To Varnish and Refurbish A Printer Drawer
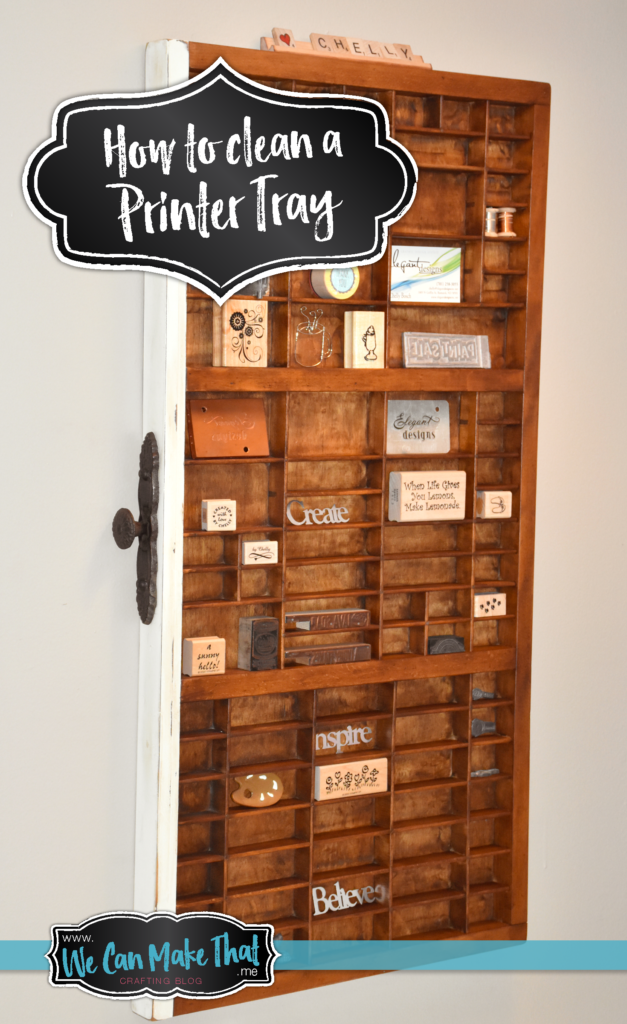
Here’s a sneak peek at the finished product… Now that it’s all clean, it’s time to start the fun part. Let’s get painting!
Disclosure: Some links on this page are affiliate links – meaning if you click through and make a purchase I may receive a commission at no additional cost to you. For more information, read our full affiliate disclosure here.
I’m having so much fun cleaning and painting this old letterpress printer drawer! Sort of makes me feel old now that printshops are getting rid of them as technology has moved beyond a need for as many of them. I’m seeing them for sale all over the place … But that’s great for me! Cause it looks adorable on my studio wall 🙂
Refurbished Printer Drawer Steps
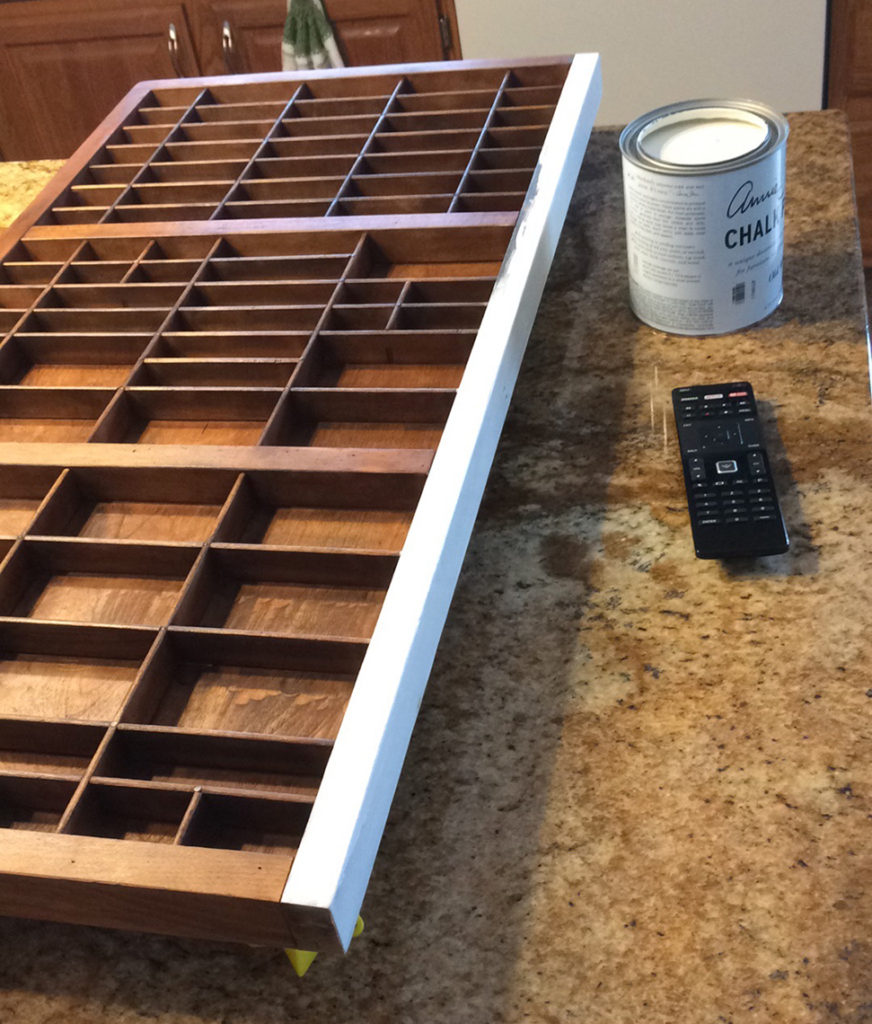
First, check out my step 1 blog post, cleaning and prepping for painting here.
Supplies I Used:
- Varathane Gel Stain – Dark Walnut
- Dry brush 1″ size
- Chalk Paint: Anne Sloan, old white
- Cotton Rag (I used cotton and made sure it was clean)
- Vintage Style Handle (I used a new one from Hobby Lobby)
- Vintage printer’s drawer
- Rags for cleaning
- Dremel Tool & Attachments
- 3 packs: Dremel Finishing Abrasive Buffs (511E)
- 3-4 packs: Dremel 1/2″ Brass Brushes (536-002)
- Varathane Gel Stain – Dark Walnut
- Glassboard (craft mat for easy cleanup on your craft station)
Here’s how I varnished the printer drawer
I used a 1-inch dry brush and simply brushed on the gel varnish in all the little nooks and crannies.
Make sure you only use a small amount, brushing it into the wood and smoothing it out. I barely used much and also used this can for a couple other projects and it’s only a 1/4 of the way gone!

I mostly went along the grain. In some smaller spots that were difficult to reach I just dug in there – Either way, make sure the varnish is smooth. Do a few sections at a time before going back and wiping off the extra gel varnish. That lets the varnish set in a little bit before removing the excess and be sure to work it in to make it look smooth.
I then wiped it smooth with the rag removing any extra varnish and touching up any spots I missed.
It wasn’t a big project but it took a little extra time to get all those little sections. The smell of this varnish wasn’t too bad so I worked on it while watching TV in the evenings. It probably took me a few hours total. I let this dry for a few days then tackled the painting.
Painting my Vintage Printer Drawer

I love chalk painting!! Mostly cause chalk painting steps are always the same 3 or 4 simple steps with great results …
Chalk Paint Simple Steps
- Clean piece with a damp rag and let dry
- Chalk paint 2 coats (first coat usually always looks awful, but keep going!)
- {*optional step} Distress (I sanded some spots for a distressed look)
- Seal with a chalk paint wax (I used a little Annie Sloan dark and some of her clear wax to get that old look)
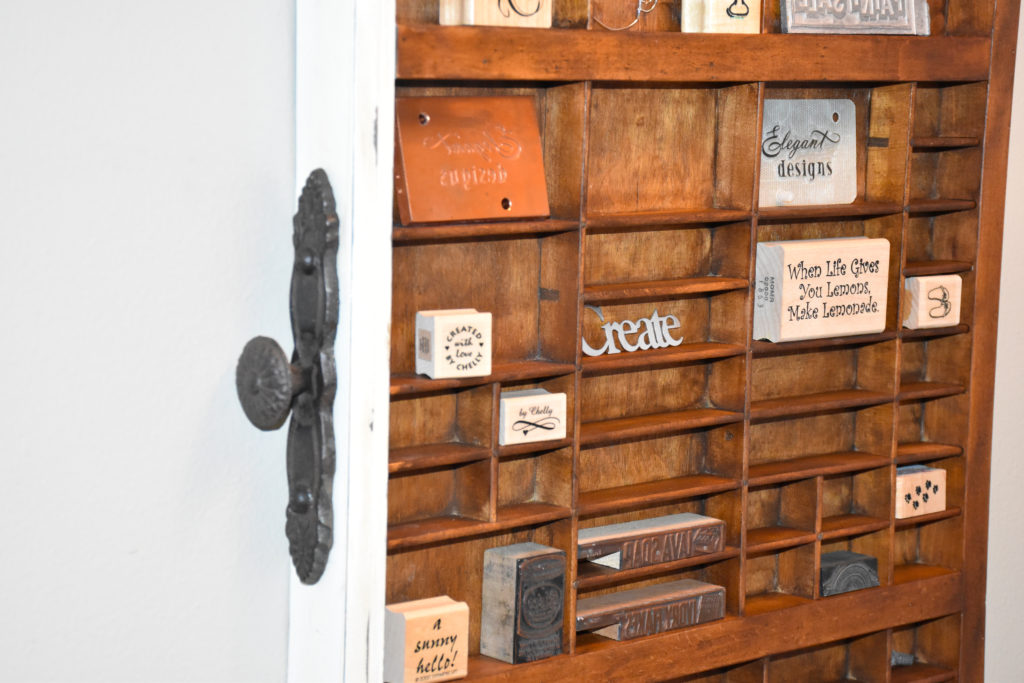
Wha-laaaa! All Done. Add the hardware and hang that puppy up. I actually used one nail and then hot glued it since I was simply for decoration. I added some old printing dies I got with it and my old logo embossing.
For the handle, I actually used one nail and then hot glued it since I was simply for decoration. I didn’t want the nail to show on the inside, this seemed to be the fasted solution.
Now to decorate your printer drawer

I added some old printing dies I got with it and my old logo embossing die I had for some decor. For a creative feel, I added some rubber stamps I use on a regular basis when crafting.
To finish off the decorating part, I added some metal words I picked up at a garage sale years ago. I thought about cutting some paper and adding some splashes of color to the back for a couple of squares. I might add a few flowers in the squares it too. (Mostly cause I have umpteen-million of them in jars in my studio.


What did you use to hang it on the wall? I just got one but we’re not sure how to securely go about it!
I used 2 “D-Ring Picture Hangers with Screws” on each side on the top. It was easy to add it and simple to hang.
Did you varnish your printer drawer over the old ink or did you clean off the ink before you varnished?
I did clean it up to remove the LEAD that was left from the dies it held so many years. Here is my blog post with the steps I took. I was pretty simple but took some time to get each little square.
https://wecanmakethat.me/cleaning-printer-drawer/