
How to make a Christmas Sign from an old Canvas
Are you looking to recycle some old canvases around your home? How about an old shirt? Let’s create a “new to you” sign from old items you probably have laying around the home.
*This post contains affiliate links. (Links to products where I might earn a commission at no expense to you).
This idea also works well if you find some very cheap decor items at the thrift store like I did.
I had shopped for old shirts to make the embroidery hoop wreaths and found this 6×18” canvas for a $1 and decided it needed some creativity.
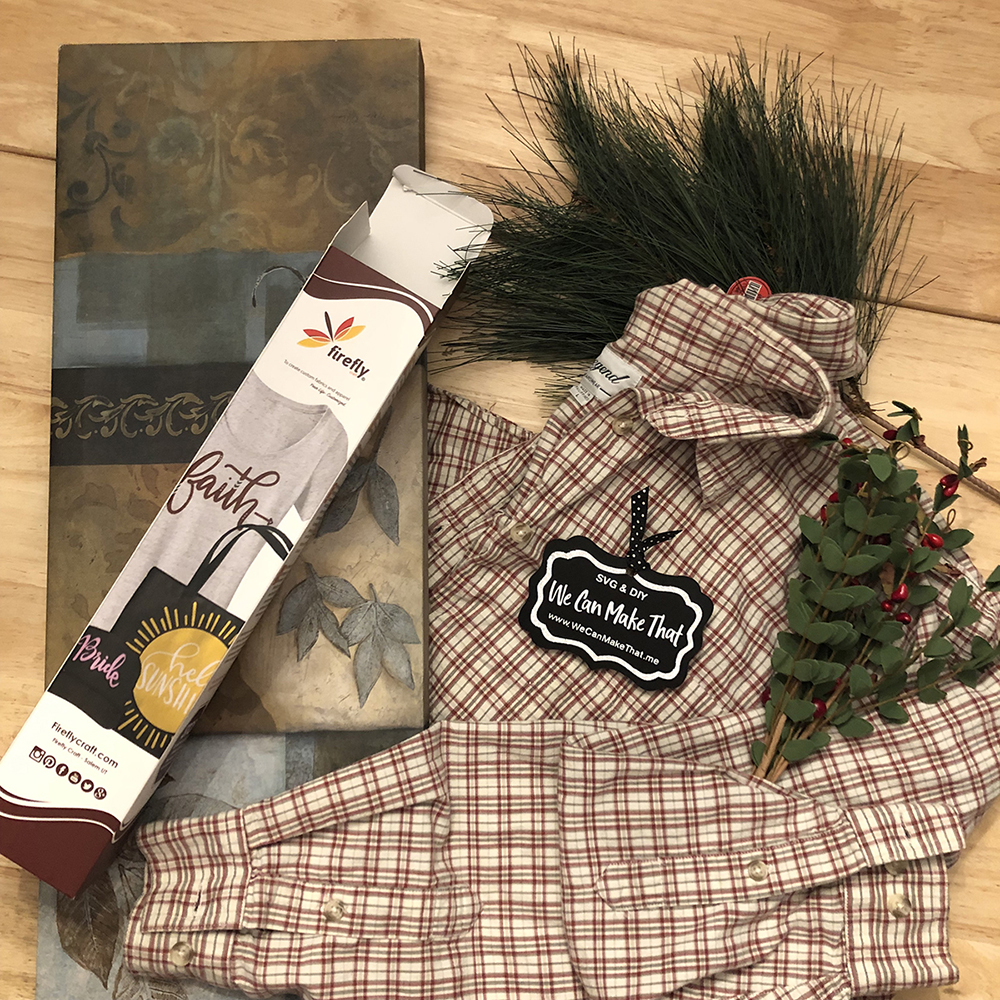
Supplies to make recycled canvases for new decor
What you need for this fun recycled canvas wall hanging idea:
- Canvas, or frame
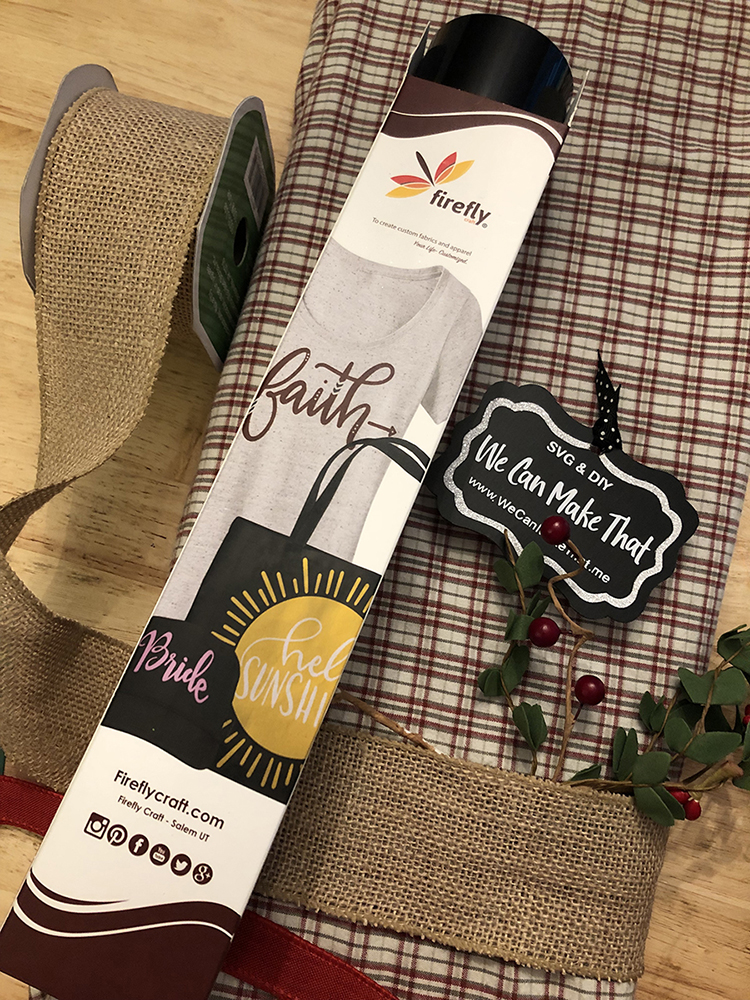
Old shirt, or material- Vinyl for the saying/SVG. I used black from Firefly
- Merry & Bright SVG
- Ribbon, or extra material
- Springs or greenery of some sort to embellish
- Staple gun
- Hot glue
Another Fun Christmas DIY Idea
Steps to make a Christmas Sign from an old Canvas
Lay the shirt out and iron it if needed. I found the best spot to center my canvas and decided to place the seam under the ribbon.
Cut the fabric 1” past the frame on the back. I ruff cut the shirt and trimmed it after I stapled it down. Make the back lay flat so it hangs on the wall nicely.
Begin by placing the shirt right side up. Lay the frame or canvas on your shirt where you want it placed.
I used painter’s tape to line up the canvas and help you find the right place to put your words.

You can cut your iron-on vinyl at this time. Apply as the settings advise you to according to the materials.
A few details about what I used for this DIY
My shirt was cotton and I use Firefly HTV. It was awesome to weed. The best I had used in a while. (Be careful not to iron-on your tape, but leave on to make stapling the fabric to the canvas easier.)
Now with the right side down, lay your fabric out and center the canvas on the material.
I used the tape as guides to line up the shirt to the canvas and then stapled it to my old canvas frame.
I did a very rough cut on the shirt for the canvas, so I had to be sure to watch my tape lines and not the shirt corners.
Now let’s see how it all worked out. If I were to do this again, I would not pick a fabric with lines. That makes it harder to line up and make it look right when it was stretched and then stapled onto the canvas.

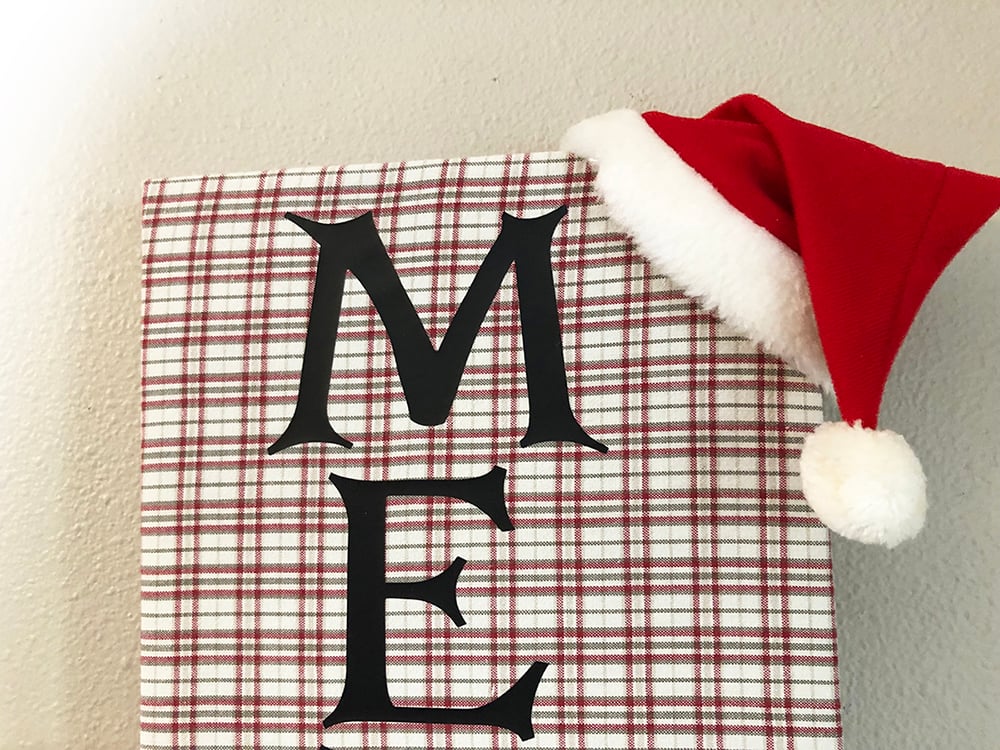
The HTV words “And Bright” were a little tricky to get to stay on the burlap, but I think it was worth the extra work.

And to let you know not all my projects turn out great the first time, I forgot to mirror my vinyl the first time I cut my words (UGH!!) Now I am trying to figure out what I can do with the ‘Merry’ HTV that is cut and not mirrored.
This Merry & Bright SVG would also be cute on a scrapbook page.
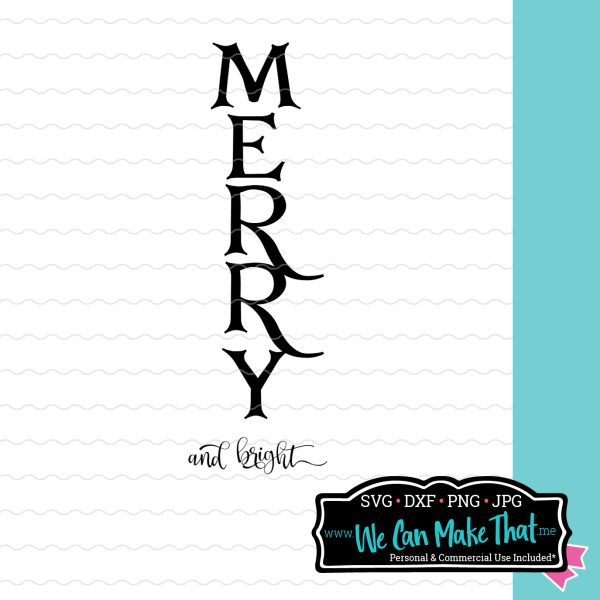
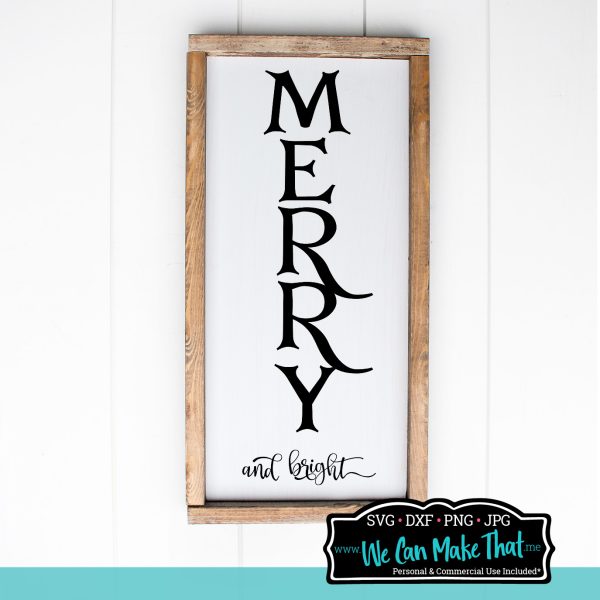
I arranged my sprigs before attaching the burlap ribbon. I wanted to see how high I wanted them to go and give them enough room so they wouldn’t cover the ‘Y’ on MERRY.
Isn’t it amazing what an old shirt can do?
This was a quick Christmas DIY. And how fun??
I can even create some other things with the rest of the shirt.
I’m thinking of a banner for my fireplace. We’ll see…. If you have any ideas I’d love to hear them below.

Let’s Connect on Social Media!


I love this! And I have most of the supplies already, so this can be a quick-start project. I covered a thin board with some cloth before, but for some reason I never thought to do it to an old canvas.