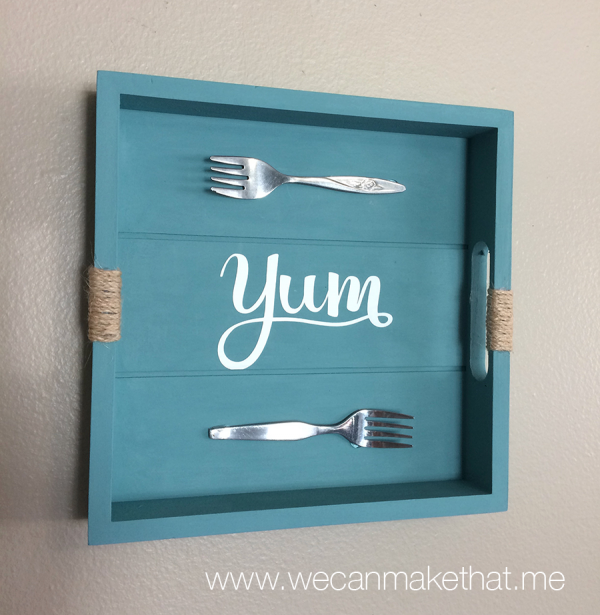
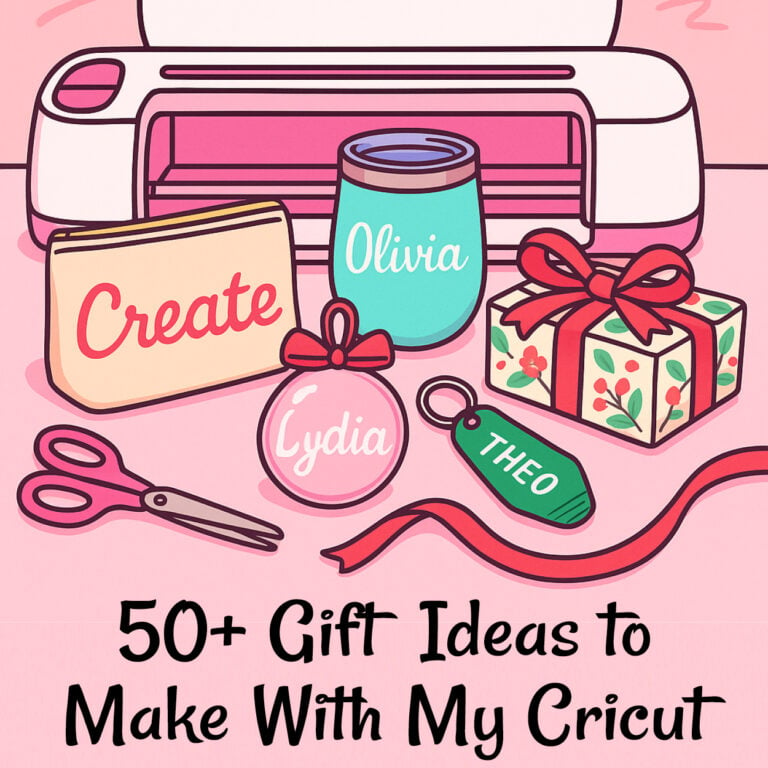
DIY Cricut Wood Tray
Let’s Create a Cute Gift or Home Decor Project!
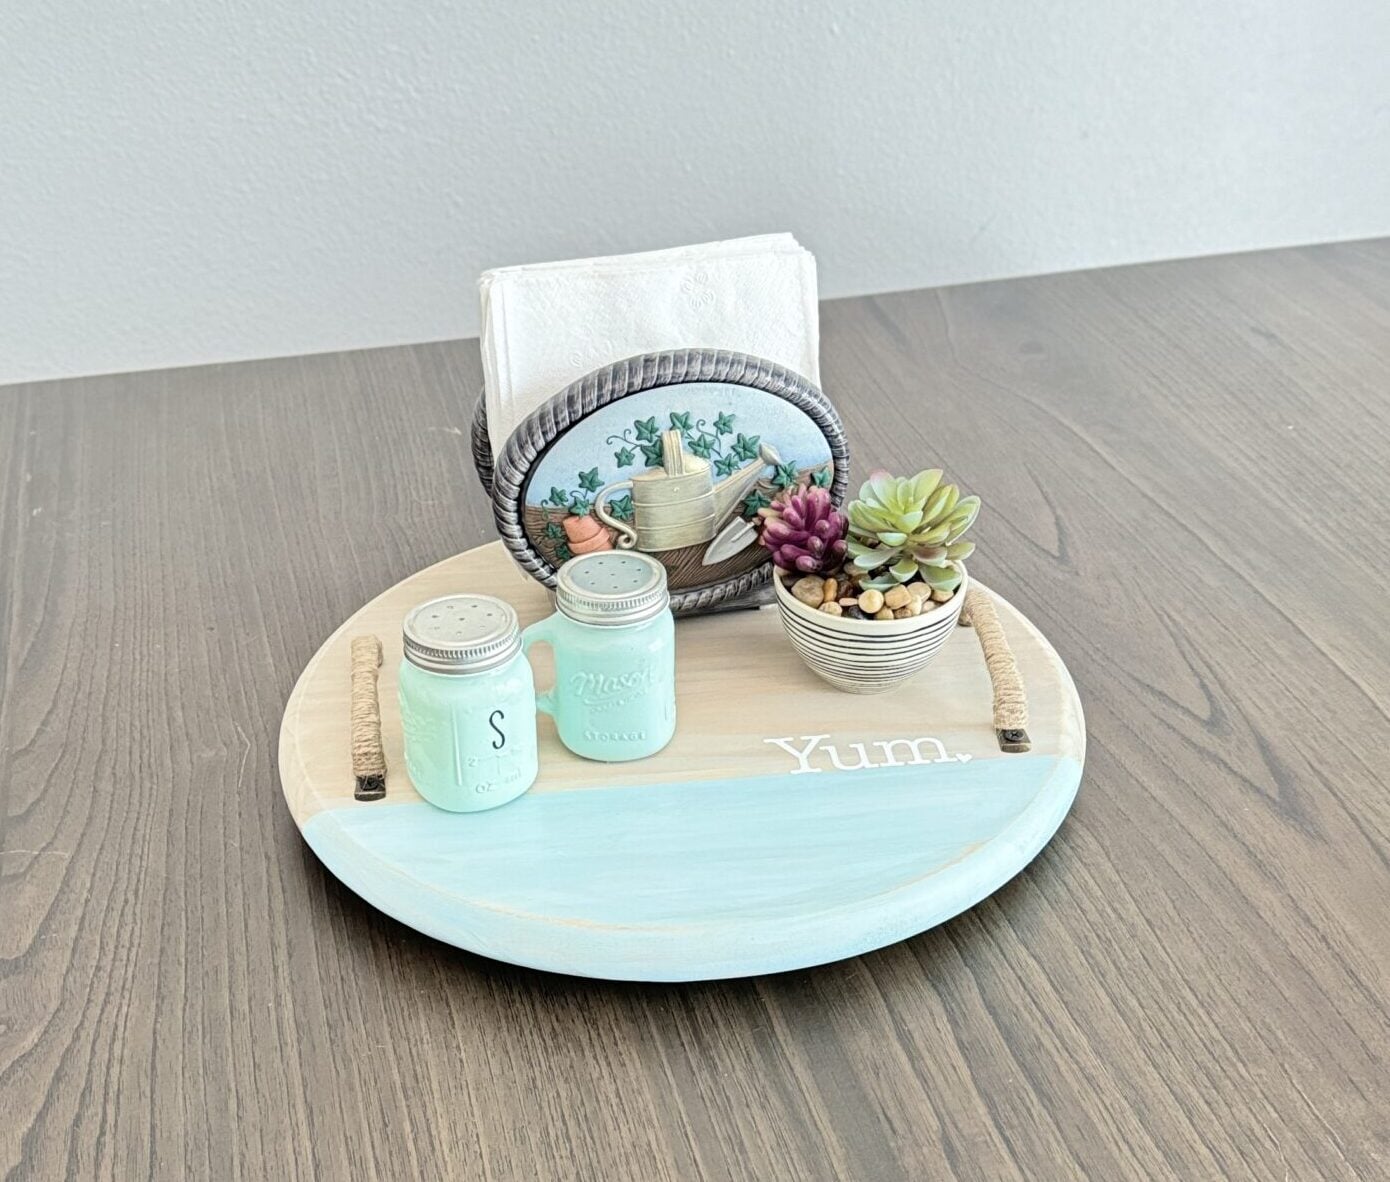
If you’re looking for an easy DIY home decor project or a thoughtful handmade gift, this DIY Cricut wood tray is going to be your new favorite craft. It looks store-bought, but it’s made with a wooden round, a little paint, and a simple vinyl design. No power tools required, unless you count your Cricut, of course.
Disclosure: Some links on this page are affiliate links – meaning if you click through and make a purchase I may receive a commission at no additional cost to you. For more information, read our full affiliate disclosure here.
This project is beginner-friendly, budget-friendly, and can be personalized for any season, theme, or person. Make one for yourself, then make five more because everyone you know will want one. Sorry in advance.
And yes, this craft pairs perfectly with coffee, a quiet afternoon, and avoiding laundry.
Watch the Video Tutorial

In this tutorial, I’ll show you how to …
Why You’ll Love This DIY Cricut Wood Tray
- It makes a professional-looking handmade gift
- Great beginner Cricut project
- Cricut Joy approved
- Uses small scraps of adhesive vinyl
- Endless personalization options
- Doubles as home decor, a serving display, or seasonal styling piece
- Quick enough to finish in an afternoon
You can display it on your kitchen counter, island, dining table, coffee bar, or seasonal tiered tray setup. Add a candle, a salt and pepper set, or cute decor, and it instantly levels up a space.
And yes, this craft pairs perfectly with coffee, a quiet afternoon, and avoiding laundry.
WAIT LIST OPEN
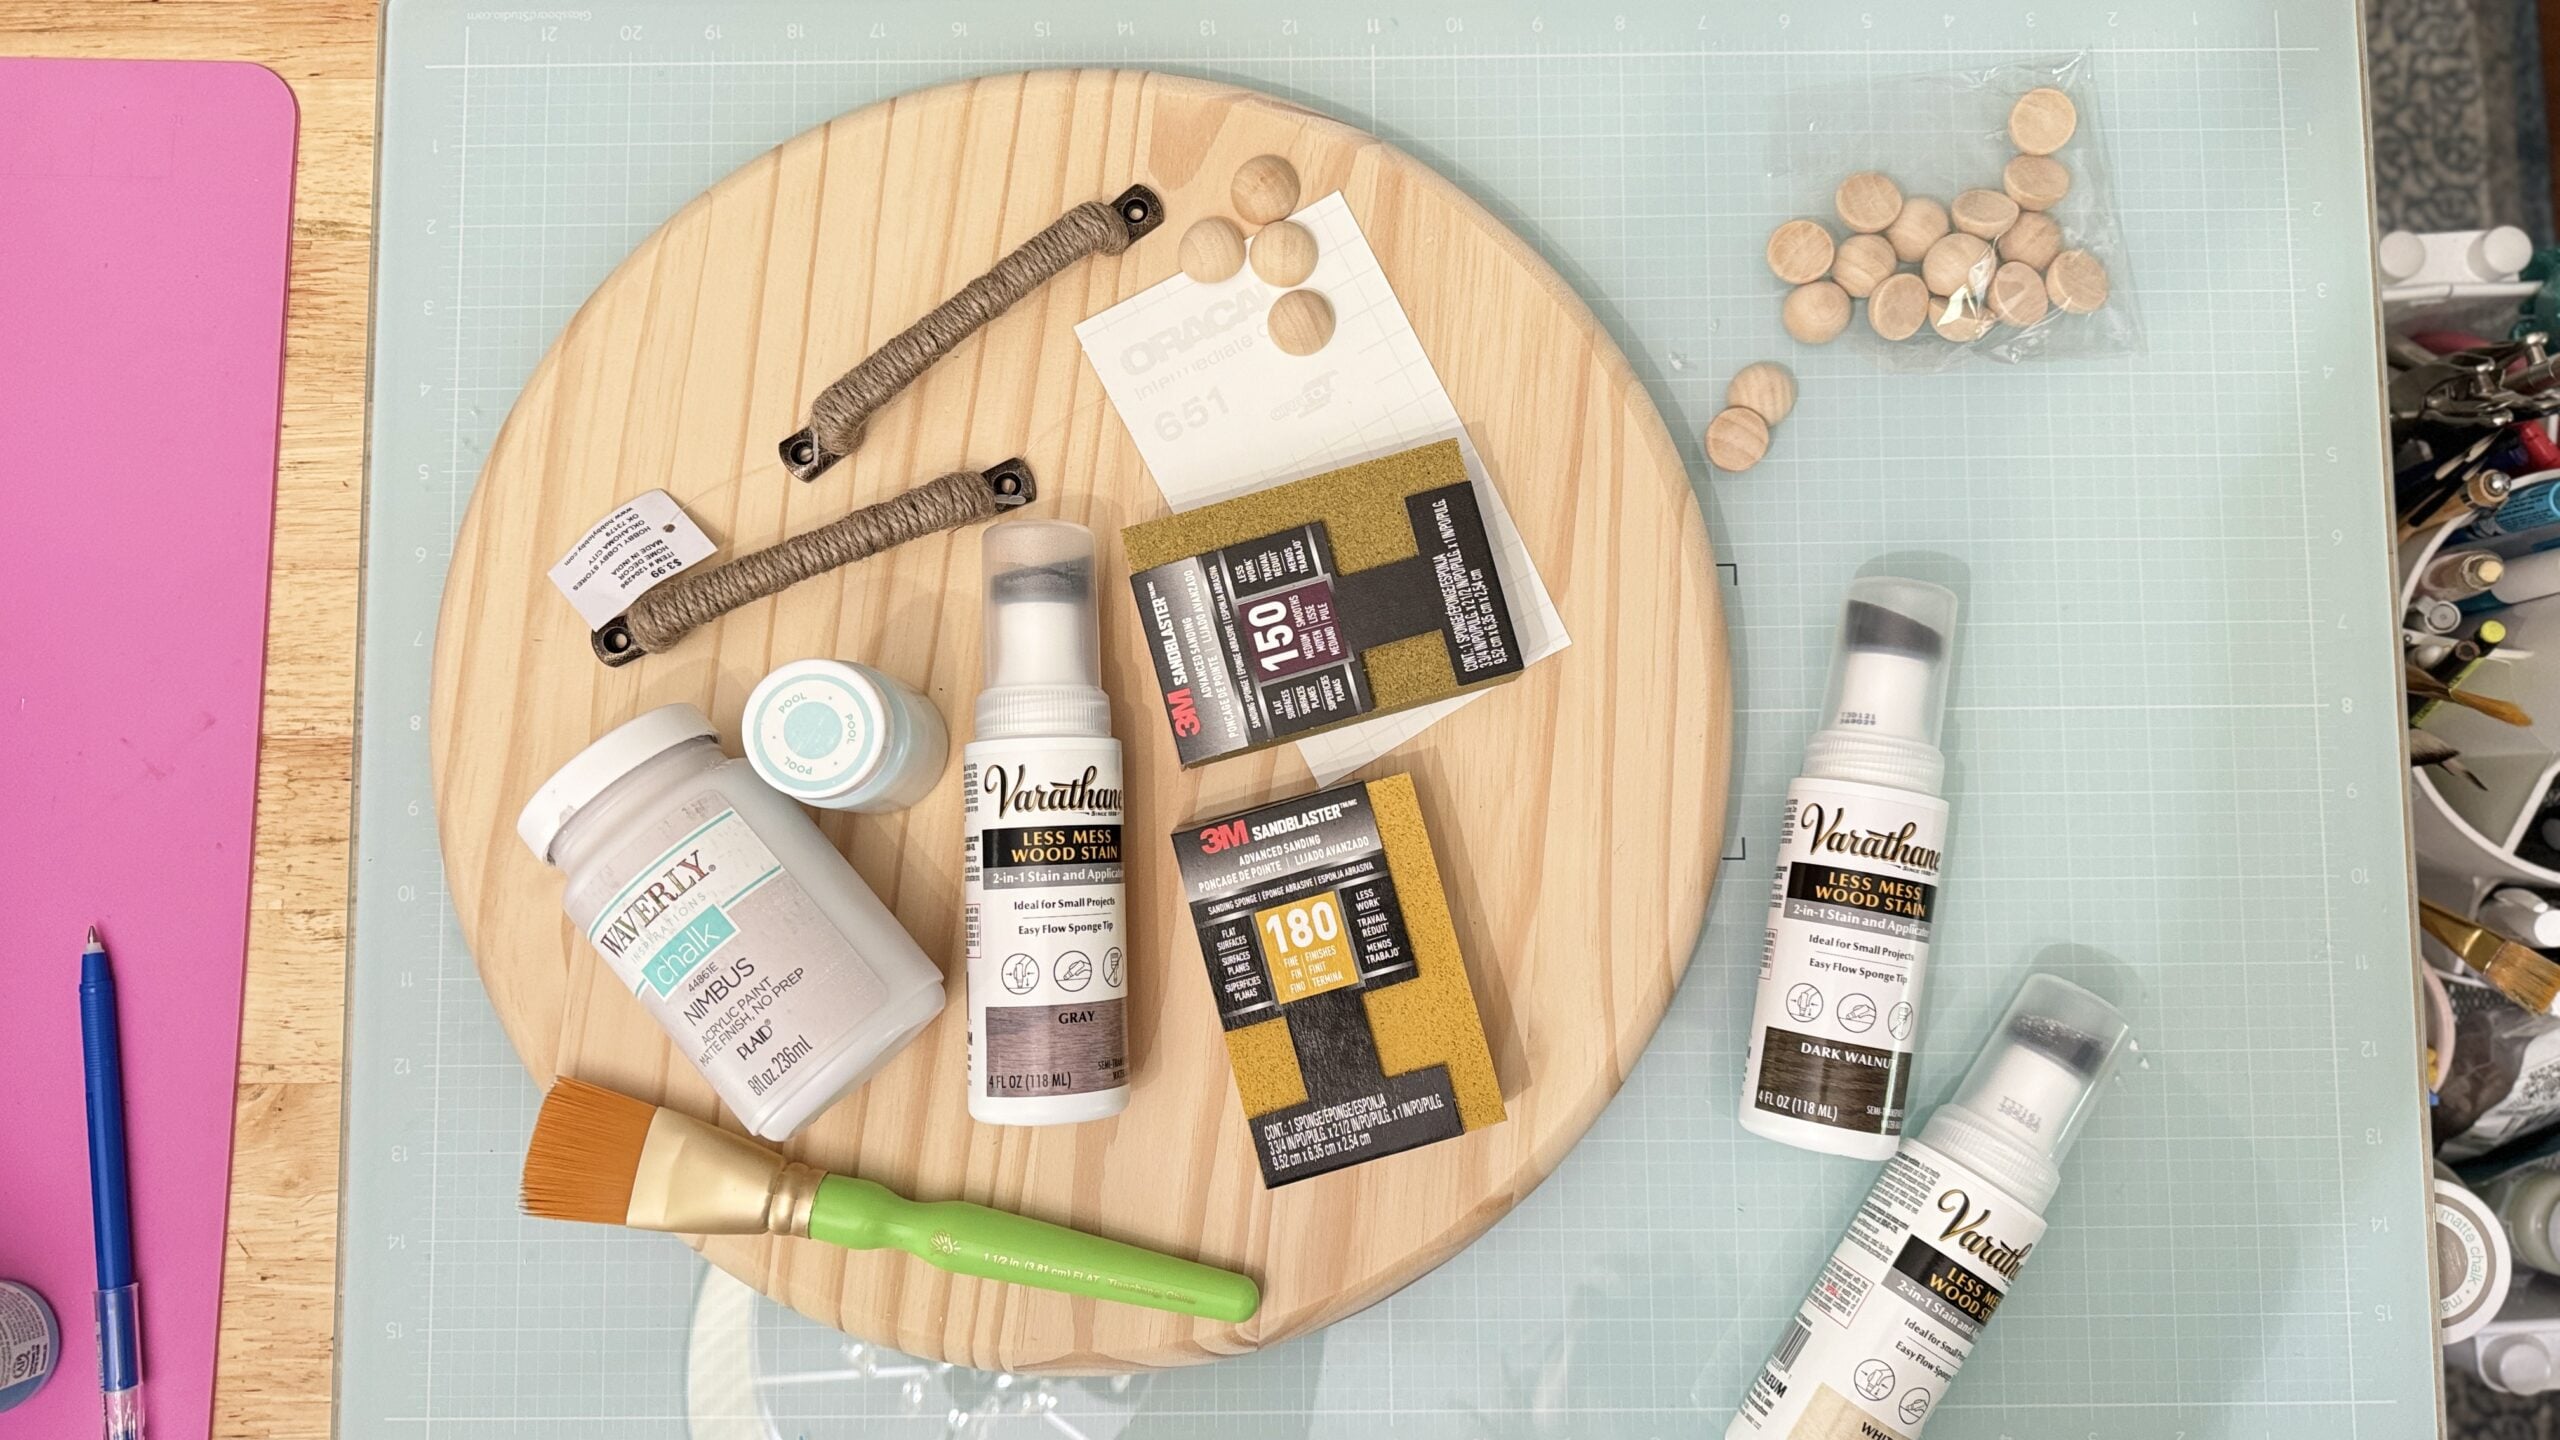
DIY Cricut Wood Tray Supplies
Most of these items can be found at craft stores, online, or in your stash already.
Supply links with similar or the exact items and tools I used on this Amazon list.
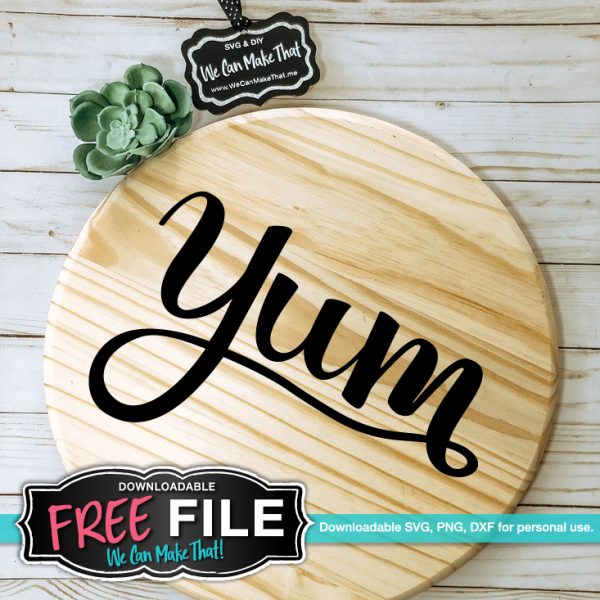
- Wooden Round Circle (12 inch or larger)
- Free SVG YUM
- Handles or Drawer Pulls
- Paint or Wood Stain (I used Waverly Pool and a gray stain)
- Adhesive Vinyl for Cricut
- Transfer Tape
- Painter’s Tape
- Sanding Blocks
- Heat Gun (optional, speeds drying time)
- Jute (optional for handle wrapping)
- Cricut Machine + Standard Grip Mat
- Weeding Tools
- Scissors or Paper Trimmer
- Drill (optional, if screwing on handles)
- Hot Glue Gun (alternative to drilling)
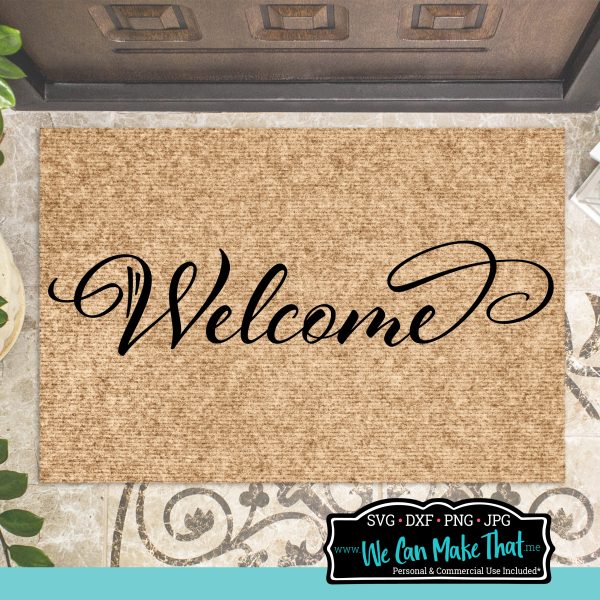
SVGs You Could Use for This Project
-
 Welcome Script SVG$0.00
 -

-
 Free Yum SVG$0.00


Step-by-Step: How to Make a DIY Cricut Wood Tray
1. Prep and Sand the Wood
Lightly sand the entire wooden round using a sanding block, especially the edges and any areas are rough. Wipe clean with a damp paper towel to remove dust and let dry completely.
2. Tape Off Your Design Section
Use painter’s tape to visually divide the tray. You can paint half the circle, create a stripe, or place your painted section wherever it looks best with your chosen handles and SVG design.
Tip: Press firmly along the tape edge to prevent paint bleed. Painting the brush strokes away from the tape’s edge also prevents the paint from bleeding.
3. Paint or Stain the Tray?
Apply paint or stain using light, even strokes. Paint away from the tape line rather than toward it. This helps create that satisfying crisp edge we all love.
Let dry. (A heat gun, or hair dryer, helps drying time if you’re impatient like I am.)


4. Remove Tape, and Distress (Optional)
If you want a farmhouse, rustic, or Joanna-Gaines-approved finish, lightly sand areas of the paint or stain to let wood show through. Wipe away dust before adding vinyl. This step is optional.
You can also add the stain over the paint for a distressed look at this step. Let dry according to the stain instructions before proceeding.
5. Cut and Weed Your Vinyl Design
Upload your SVG to Cricut Design Space. Resize to fit your tray.
Since this project uses adhesive vinyl, do not mirror the design. (However, using HTV is an option too)
Load your mat, select Vinyl or Permanent Vinyl in the Materials list, and cut. Weed your design.
6. Apply Transfer Tape and Place Vinyl
Burnish your vinyl onto transfer tape and remove the backing. Be sure to use regular transfer tape. (Some are more sticky for things like glitter or foil adhesive, and that extra adhesive for these might remove some paint.)
Position the design where you want it on the tray. Press down firmly and peel away the transfer tape slowly.

7. Add Handles
These can be decorative or functional. You can either:
• Drill or screw in the handles, or
• Hot glue them if the tray will be decorative only.
Test handle spacing with painter’s tape before committing. Your tray deserves symmetry.
8. Add Protective Feet (Optional but cute)
Mini wood half-rounds, or bumpers, on the bottom of the tray will raise the tray off the table slightly, making it feel more finished and high-end.
You can also get a lazy-suzan hardware for the bottom to make it spin. This really uplevels the tray!
Congratulations. Your DIY Cricut wood tray is officially Pinterest-worthy.


DIY Tray for a GIFT!
This Makes the Perfect Gift for Lots of Holidays. Pair it with a candle, kitchen towel, seasoning set, or a mini plant, and it becomes a thoughtful, personalized present.
This DIY Cricut wood tray works for almost anything, including:
- Mother’s Day
- Birthdays
- Hostess gift
- Bridal shower
- Housewarming
- Anniversary
- Christmas
- Teacher gift
- Secret Santa
- Wedding gift
- Neighbor gift
- First apartment gift
- Craft fair best-seller (more on that below)

Crafting for Business: These Sell Really Well
If you sell handmade items online or at craft fairs, add this DIY Cricut wood tray to your product lineup. Sellers love them because:
- Low material cost
- High perceived value
- Customization increases profit margin
- Great for seasonal markets
- Personalized items sell fastest
You can offer:
- Last-name trays
- Established-year trays
- Kitchen quotes
- State or hometown designs
- Holiday versions (Halloween, Christmas, Spring)
- Wedding or bridal shower gifts
And if you want help growing your creative business with marketing strategies that actually work, that’s what my Creative Business Club is for. It’s where makers turn their creative talent into consistent income using simple systems, community, and step-by-step strategy, not burnout.
Learn more here!
Your craft business doesn’t need MORE ideas.
You need a clear Plan!
The Creative Business Club helps you decide what is best for your business that will actually bring in sales. What members enjoy most:
- Know what to post each month (no more “posting and praying”).
- Attract the right customers with smarter content
- Stay consistent and turn followers into buyers.
- Get support + co-working to actually get it done.

This isn’t just advice. It’s accountability, action, and a path that actually works.
Helpful Tips for Success
- Don’t overload your brush with paint or stain.
- Always weed toward the open side of letters for faster weeding.
- Use permanent adhesive vinyl if the tray will be handled often.
- Let the stain fully dry before applying the vinyl.
- Test handle spacing before drilling.
- If paint bleeds, lightly sand and restain for a distressed look.
Whether you give it, sell it, or proudly display it in your own kitchen, a DIY Cricut wood tray is one of those satisfying projects that turns simple materials into something beautiful and useful. It’s affordable, customizable, and great for crafters at any level.
If you make one, tag me on social so I can cheer you on. I love seeing how you personalize your crafts.
And if you love crafting, come hang with me at my free group on Facebook!
Connect with Chelly!