Cricut and HTV: A Detailed Guide for Crafters
Disclosure: Some links on this page are affiliate links – meaning if you click through and make a purchase I may receive a commission at no additional cost to you. For more information, read our full affiliate disclosure here.
In this blog post, this is the ultimate guide for crafters using heat Transfer Vinyl. I’ll guide you through the process of using vinyl with your Cricut machine to create stunning iron-on vinyl projects on this cute cotton Bella Canvas fleece hoodie.
We’ll dive into the steps for applying vinyl to shirts using your Cricut machines and explore key aspects like Cricut Design Space, SVG files, heat presses, and weeding tools with easy-to-follow step-by-step instructions.
I’m creating a cute hoodie with my free CREATE word SVG file. Grab yours and let’s get creating. Whether you’re a Cricut Maker expert or a Cricut Explore Air newbie, we’ve got you covered.
My goal is after this blog post; you will have the knowledge to achieve the best results with HTV, iron-on designs, and more to help you learn about vinyl and your electronic cutting machine. I use a Cricut and Siser Romeo but most of this post will help you no matter your cutter.

Sign up to get our Friday Freebie Emails for crafters!


Step 1: Gather Your Supplies
The first step is to gather your items for your iron-on project. Here I’ll cover heat press and the home iron steps to get you the best results.
For the heat press method, make sure you have:
- Cricut machine with design software
- Fine Point Blade works best for most vinyl
- Siser brand glitter vinyl
- Cotton hoodie or Cotton T-shirts (Bella Canvas brand is my favorite)
- Heat press
- Design file: SVG or what your cutting machine prefers
- Brayer (to help the vinyl stick to the mat)
- Teflon sheet or parchment paper
For the iron-on method, you’ll need:
- Cricut machine with design software
- Fine-Point Blade works best for most vinyl
- Siser glitter vinyl
- Cotton hoodie or Cotton T-shirts (Bella Canvas brand is my favorite)
- Household iron
- Design file: SVG or what your cutting machine prefers
- Cricut Easypress mat (Or iron board)
- Brayer (to help the vinyl stick to the mat)
- Teflon sheet or parchment paper

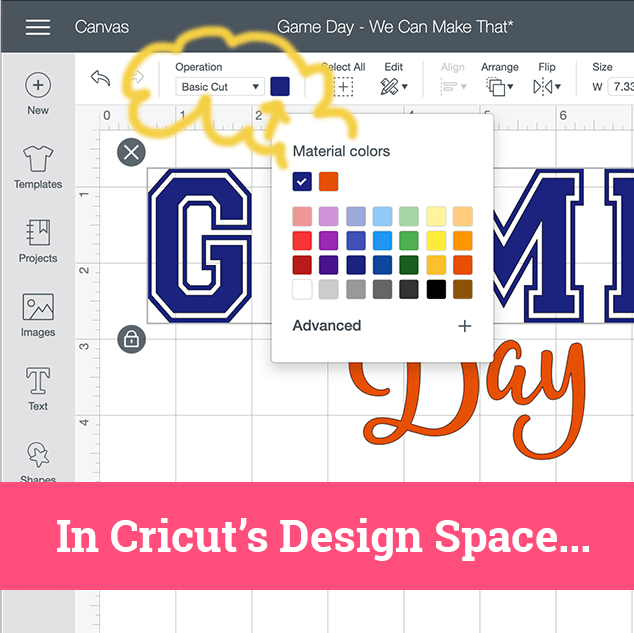
Step 2: Designing with Cricut
Fire up your Cricut and let’s get cutting. Be sure to MIRROR your image at this step. watch the video with this post to see how to upload to Cricut Design Space. (On the cutting mat step, click Mirror Image).
Once satisfied with your design, and you’ve picked your colors, load the glitter vinyl onto the cutting mat and let the Cricut work its magic.
- Apply your HTV to your mat.
- Make sure the clear plastic carrier sheet is touching the mat.
- Adjust your settings to the type of vinyl you are using. Some glitter vinyls need a deeper cut then HTV like Easy Weed.

Step 3: Weeding the Vinyl
Carefully weed the excess vinyl from your design using a weeding tool or your fingers. Take your time to ensure clean lines and intricate details are preserved. This step is like unveiling the hidden gem within your design.

Step 4: Pressing your HTV
Heat Press Method
Preheat the heat press to the recommended temperature for Siser glitter vinyl (usually around 320°F). Place your weeded design onto the hoodie, cover it with a Teflon sheet or parchment paper, and press with firm, even pressure for 10-15 seconds. Peel the carrier sheet while it’s still warm, and voilà – you’ve just added a touch of glitter to your hoodie!
Be sure to check your vinyl and make sure you press according to their instructions for the exact temperature to help our vinyl last long and not peel off.
Sign up to get our Friday Freebie Emails for crafters!
Iron-On Method with Cricut
If you’re using a household iron, set it to the cotton setting (no steam). Be sure to use a flat surface that can withstand the heat. Place your weeded design onto the Bella Canvas fleece hoodie, cover it with a Teflon sheet or parchment paper, and press down with medium pressure. Iron each section for about 20-30 seconds, applying heat evenly. Allow the vinyl to cool slightly before peeling off the carrier sheet.
Each vinyl has a setting to get the most washes or use from the product. I like to check the products on the manufacturer’s website for things like:
- The correct time
- The best temp
- Hot, Cool or Warm Peel
- Materials it works best on
- Amount of pressure
I generally use Siser brand vinyl. They have a handy sheet for this here. Click the resource tab on their site (Cheat Sheet here)

Fun Facts about Cricut:
- Did you know the Cricut machine is capable of cutting over 300 materials, including vinyl, cardstock, fabric, and more?
- Cricut’s Design Space offers a wide range of pre-designed projects, making it easy for crafters of all levels to create stunning pieces.

Common Questions when Crafting with HTV
When getting a new Cricut or cutting machine, it can be overwhelming with your make your first Cricut Shirt. The following are some best tips for your next Cricut iron-on vinyl t-shirts (or what ever garment you are making).
1. How do you put vinyl on a shirt?
When applying vinyl to a shirt, start by creating your design in Cricut Design Space. Save it as an SVG file, ensuring it’s compatible with your Cricut machine. Place the heat transfer vinyl (HTV) on the cutting mat with the shiny side facing down. Using your Cricut machine, cut out the design following the settings recommended in the Cricut Heat Guide. Once cut, use a weeding tool to remove the excess vinyl, leaving only your intricate design. If using a heat press, follow the recommended temperature settings and press the design onto the shirt for a warm peel. For an iron-on method, set your iron to the appropriate heat source, cover the design with a Teflon sheet, and press with even pressure.
Free Create SVG file to use as your designs or check out other create themed SVG files.
See the other free cut files and heat transfer vinyl designs we offer in our shop. We even have an iron-on section in the shop and tons of other files for craft projects.
-
 Create Stacked Cut File$0.00
 -
Create Cut File$3.00
-


2. How do you get Cricut vinyl to stick to a shirt?
Ensuring a lasting bond between Cricut vinyl and a shirt is crucial for a professional finish. After weeding the excess vinyl, position your design on the shirt. For best results, make sure to mirror your design in Cricut Design Space if using iron-on vinyl. When using a heat press, follow the recommended time and temperature settings from the Cricut Heat Guide. Apply firm, even pressure during the pressing process. If opting for an iron, press down with moderate pressure, covering the design with a Teflon sheet or parchment paper. For intricate designs, consider using the Cricut Easy Press for precise and consistent heat application.
3. Can I put vinyl on a shirt with an iron?
Yes, you can achieve professional-looking results by using an iron to apply vinyl to a shirt. Set the iron to the appropriate heat source, depending on the vinyl type and fabric. Cover the design with a Teflon sheet or parchment paper to protect both the vinyl and the iron. Apply even pressure and heat to ensure proper adhesion. Allow the vinyl to cool slightly before peeling off the carrier sheet. This method is especially convenient for those without access to a heat press or Easy Press.
4. Does heat transfer vinyl need transfer tape?
Unlike adhesive vinyl, heat transfer vinyl (HTV) does not require transfer tape for application. The shiny side of HTV serves as its own transfer tape (I call it the “shiny plastic carrier sheet” – not very techy, I know haha).
After weeding the excess vinyl, position your design on the shirt and press it down with a heat source, such as a heat press or iron. The carrier sheet easily peels away after the heat application, leaving your vinyl design securely adhered to the garment.

What you should know about cutting Heat Transfer Vinyl (HTV)
These are few questions and some terms that crafters should be familiar with when using vinyl and heat to make crafts:
1. Preparing Your Design:
Begin by designing your artwork in Cricut Design Space. Ensure that your image or text is appropriately sized and that any text is mirrored (flipped horizontally) since you’ll be cutting from the back of the vinyl. This is also a good place to talk about fonts and sizes. make sure things are big enough. Really small or thin fonts can be harder to use with HTV.
2. Loading the HTV onto the Cutting Mat:
Place the HTV on the cutting mat with the shiny side facing down. The shiny side is the carrier sheet, and it usually has a clear, glossy appearance. The colored or matte side is the actual vinyl that will be transferred onto your project. The carrier sheet holds the vinyl in place during cutting and application.
3. Setting the Correct Cut Settings:
Access the cut settings menu in Cricut Design Space and select the appropriate material setting for HTV. Refer to the Cricut Heat Guide for recommended settings based on the type of HTV you’re using. A kiss cut is often employed for HTV, which means cutting through the vinyl layer but not through the backing sheet.
4. Kiss Cutting and Weeding:
A kiss cut involves cutting only the vinyl layer without penetrating the backing sheet. This ensures that the design stays intact on the carrier sheet, making the weeding process more manageable. After cutting, carefully weed away the excess vinyl using a weeding tool, leaving your design on the carrier sheet.
5. Which side of iron-on vinyl goes down on Cricut?
The Shiny Side – HTV’s Carrier Sheet – this means the shiny side of the HTV is the carrier sheet, and it plays a crucial role in the application process.
- When cutting on your Cricut, this side goes on the mat (you are cutting on the side that touches the shirt.)
- When you’re ready to transfer your design to the fabric, make sure the carrier sheet is facing up (shiny side touches the iron or heat press.
The vinyl adheres to the fabric, and the carrier sheet is peeled away after heat application.
6. Applying Heat:
Whether you’re using a heat press or an iron, follow the recommended temperature settings for your specific HTV. Place the weeded design on your fabric, cover it with a protective layer (Teflon sheet or parchment paper), and apply heat with firm, even pressure. Allow the vinyl to cool slightly before peeling off the carrier sheet. This is known as a warm peel method.

Iron-On SVG Files in the Shop
Fun SVGs designed with shirt making in mind!


The terms “Cool Peel,” “Hot Peel,” and “Warm Peel” refer to the temperature at which you should peel off the carrier sheet after applying heat to vinyl during the crafting process. Each term corresponds to a specific range of temperatures and plays a crucial role in achieving the best results when working with different types of vinyl.
- Cool Peel:
- A “Cool Peel” refers to waiting until the vinyl and fabric have cooled completely before peeling off the carrier sheet. This is common with certain types of heat transfer vinyl (HTV) that are designed to be peeled when they are at room temperature. Cool peeling is often recommended for specific specialty vinyl or intricate designs to prevent distortion or stretching of the material.
- Hot Peel:
- Conversely, a “Hot Peel” involves peeling off the carrier sheet immediately after the heat application, while the vinyl and fabric are still hot. This method is typically associated with specific types of HTV, and it is used to achieve a smooth, glossy finish. Hot peeling is often preferred for achieving a vibrant and durable bond between the vinyl and fabric.
- Warm Peel:
- A “Warm Peel” falls between cool peeling and hot peeling. In this case, you wait for the vinyl and fabric to cool slightly, but not entirely, before peeling off the carrier sheet. Warm peeling is a commonly recommended method for various types of HTV, providing a balance between allowing the vinyl to set and ensuring a clean peel without distortion.
By understanding these terms and following the recommended techniques, crafters can confidently work with Heat Transfer Vinyl, creating stunning and personalized projects with ease.
Terms to Know when crafting with HTV vinyl with your Cricut
- Carrier Sheet: The glossy side of the HTV that holds the vinyl design in place during cutting and application.
- Weeding: The process of removing the excess vinyl from around the design using a weeding tool.
- Heat Press: A machine used to apply heat and pressure to transfer the HTV onto fabric.
- Iron-on Vinyl: Another term for HTV, emphasizing its application using a household iron.
What are different types on vinyl to use with your Cricut.
Heat Transfer Vinyl (HTV):
Heat Transfer Vinyl, commonly known as HTV, is a versatile material used to create designs on fabrics and textiles. Crafters use HTV for its ability to adhere to various materials, including cotton, polyester, and blends, using heat and pressure.
It’s name explains it, but when the vinyl is exposed to a heat source, such as a heat press or household iron.
HTV comes in an array of finishes, from matte to glossy, and even specialty types like glitter or foil. It’s my personal go-to choice for personalizing T-shirts, hoodies, tote bags, and more.
Permanent Adhesive Vinyl (PSV):
Permanent Adhesive Vinyl, often referred to as PSV (Pressure-Sensitive Vinyl), is a self-adhesive material perfect for creating long-lasting designs on hard surfaces. This type of vinyl comes with an adhesive backing that activates with pressure, making it ideal for projects like custom decals, home decor, and personalized items. PSV is available in wide variety of vibrant colors, finishes, and even patterns – allowing crafters to unleash their creativity. Whether you’re decorating glass, wood, or plastic, permanent adhesive vinyl provides a durable and resilient solution. It’s important to note that PSV doesn’t require mirroring like HTV since the design is applied to the outside of the material.
Adhesive Vinyl:
In the broader sense, Adhesive Vinyl is a general term referring to various vinyl materials with an adhesive (sticky) backing. This category includes both Permanent Adhesive Vinyl (PSV) and removable or temporary adhesive vinyl. Adhesive vinyl is a staple for Cricut crafters who want to explore beyond fabric applications.
I think if this as decals (for your cars) but it’s often use to customize laptops, phone cases and water bottles to creating intricate wall decals, the possibilities are limitless. Crafters can choose from an extensive palette of colors and textures to achieve their desired aesthetic. (Not to be confused with sticker or printable vinyl paper).
Understanding the differences between HTV, PSV, and adhesive vinyl empowers Cricut crafters to select the right material for their specific projects. Whether you’re aiming to embellish your wardrobe with HTV or add a personal touch to various surfaces with adhesive vinyl, the Cricut machine becomes your creative accomplice in bringing your designs to life.

Which Cricut machines can SVG files in Cricut Design Space?
This includes popular models such as the Cricut Explore Air series, Cricut Maker, and both of the cute little Cricut Joy models.
SVG (Scalable Vector Graphics) files are widely supported in Cricut Design Space, making it easy for users to import, customize, and cut intricate designs using their Cricut machines.

Here’s a brief overview of some Cricut machines that were available up to my last update:
- Cricut Explore Air Series:
- The Cricut Explore Air and Explore Air 2 are great machines for various craft projects. They can cut various materials with a couple blade options, and work seamlessly with SVG files in Cricut Design Space.
- Cricut Maker:
- The Cricut Maker (this is what I have) is known for its precision and ability to cut an extensive range of materials, including fabric, wood, and more. It is fully compatible with SVG files in Cricut Design Space, offering advanced cutting capabilities for various crafting projects due to the different blade options like rotary blade and the knife blade.
- Cricut Maker 3 is very similar to the original but offers a tray for smart materials (like vinyl) that don’t require a mat.
- Cricut Joy and Xtra Joy:
- The Cricut Joy (smaller module) and the Cricut Xtra Joy are compact, portable machines for quick and easy crafting. This is a fast machine and I love how my Cricut Joy cuts. Perfect for small projects or on the go.
- They both support SVG files in Cricut Design Space, making it a convenient choice for on-the-go projects.
- Cricut Xtra Joy is perfect for sticker making!
It’s important to note that Cricut may release new machines or updates after my last knowledge update in January 2023. Therefore, it’s recommended to check the official Cricut website or contact Cricut support for the latest information on machine compatibility and features. Always ensure that your Cricut machine’s firmware and software are up to date for optimal performance and compatibility with SVG files.
Happy crafting, and may your hoodies be as unique as you are!